Working With External Excel Workbooks
Beside access to the Excel workbook built in to INOSIM (see tip Benefit From Your Excel Knowledge While Working With INOSIM), existing Excel files may be opened or new workbooks may be created with the help of Visual Basic.
Preparation
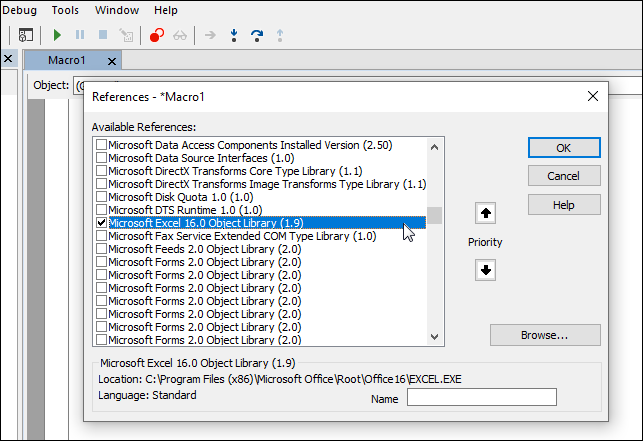
- Enable the Microsoft Excel Object Library in the INOSIM Basic editor (menu Tools/References):
- Create a new object variable (e.g., Excel) specified as global Public variable:
Public Excel As Object 'As public variable at top of the MacroAssign the Excel application to that object variable by using the CreateObject function, for example in your simulation´s initialization, to make it available in all later functions.
Set Excel = CreateObject("Excel.Application")With this object, you have access to MS Excel. Now you can either create new workbooks, or open existing ones.
Opening an existing external Excel workbook
To open an already existing Excel workbook, you can use the Open method.
The following Code-Snippets provide a handy function to open an Excel Workbook in one line and show how the Workbook can be manipulated from within VBA.
Private Function OpenExternalWorkbook(pathToWorkbook As String) As Workbook
	'Open external Excel Workbook
	' returns Workbook object myExtWorkbook

	Dim myExtWorkbook As Workbook

	Set Excel = CreateObject("Excel.Application")
	Set myExtWorkbook = Excel.Workbooks.Open(pathToWorkbook)

	Set OpenExternalWorkbook = myExtWorkbook

End Function
' Don't forget the declaration of the global variable "Excel", as explained above
Private Sub Simulation_Init()
Dim myWorkbookPath As String
Dim myWorkbook As Workbook
Dim myWorksheet As Worksheet
Dim numBatchesA As Integer
Dim numBatchesB As Integer
Dim numBatchesC As Integer
'Change this to the location of your workbook
myWorkbookPath = "C:\Users\INOSIMUser\Data\externalWorkbook.xlsx"
Set myWorkbook = OpenExternalWorkbook(myWorkbookPath)
Set myWorksheet =myWorkbook.Worksheets("Number of Batches")
'Read number of Batches myWorksheet
numBatchesA = myWorksheet.Cells(1,2) '=10
numBatchesB = myWorksheet.Cells(2,2) '=15
numBatchesC = myWorksheet.Cells(3,2) '=12
'myWorkbook.Save 'Use to save changes to the workbook, if desired
myWorkbook.Close 'Important!
Console.Information("Batches of Product A: " & numBatchesA)
Console.Information("Batches of Product B: " & numBatchesB)
Console.Information("Batches of Product C: " & numBatchesC)
End SubIn the above example, the Workbook is opened and values are read from the specified Worksheet.
If changes have been made in the worksheet, they can be saved using the Save method. When the workbook is no longer needed, close it with the Close method. Make sure to always close Workbooks you open, to avoid unexpected behavior and data loss.
Tip: You can also initiate manual selection of the workbook with the help of the GetFilePath function:

Creating a new Excel workbook
If you wish to create a new Excel workbook, for example, to store the results of particular simulation runs separately, you can use the Add method.
The following example code shows the steps you have to take for this purpose:
' Don't forget the declaration of the global variable "Excel", as explained above

Private Function WriteResultsToNewWorkbook()
	Dim savePath As String
	Dim myWorkbook As Workbook
	Dim myWorksheet As Worksheet

	Set Excel = CreateObject("Excel.Application")

	'Create a new workbook and
	'Add a worksheet and rename it
	Set myWorkbook = Excel.Workbooks.Add
	Set myWorksheet = myWorkbook.Worksheets.Add
	myWorksheet.Name = "Results 1"

	'Write results into the new workbook
	myWorksheet.Cells(1,1) = "Storage Product A"
	myWorksheet.Cells(1,2) = "Storage Product B"
	myWorksheet.Cells(1,3) = "Storage Product C"

	myWorksheet.Cells(2,1) = 5000
	myWorksheet.Cells(2,2) = 11250
	myWorksheet.Cells(2,3) = 4800

	'Save and close the new workbook
	savePath = "C:\Users\INOSIMUser\Data\externalWorkbookResults.xlsx"
	myWorkbook.SaveAs(savePath) 'Updates the path of the workbook, too, so it can be used with .Save now as well
	'Console.Information(myWorkbook.FullName) 'Shows the full path of the new workbook
	myWorkbook.Close

End Function
First, a new Excel workbook is created, then a new worksheet is added to it. Then, the worksheet may be edited as usual. In this example, the contents of the tanks Storage A, Storage B, and Storage C are written to worksheet “Results 1”. After all results have been written, the new workbook has to be saved. Use the SaveAs method to specify the path and file name. This updates the file path stored in the Workbook object, so that afterwards, you can use the Save method as described above. Finally, make sure to use the Close method to close the workbook.
Downloads
(For registered INOSIM Users only)
- INOSIM Project
- Example Workbook
- PDF printout of this Tip & Trick
More Questions?
Want to know more about this topic or have another question? Please contact us!
More Tips & Tricks
Benefit from your Excel VBA Know-how
Benefit from your Excel VBA Know-how In this tip and trick we want to show you how to activate and use Excel’s VBA commands from…
Event Call Sequence
As an experienced INOSIM user, you are aware that you are working with a discrete-event simulation software. For most events, VBA controls can be called…
In INOSIM, the availability of resources and units can be represented using Shift Calendars. A Shift Calendar determines when a unit is available or how…